
Table of Contents
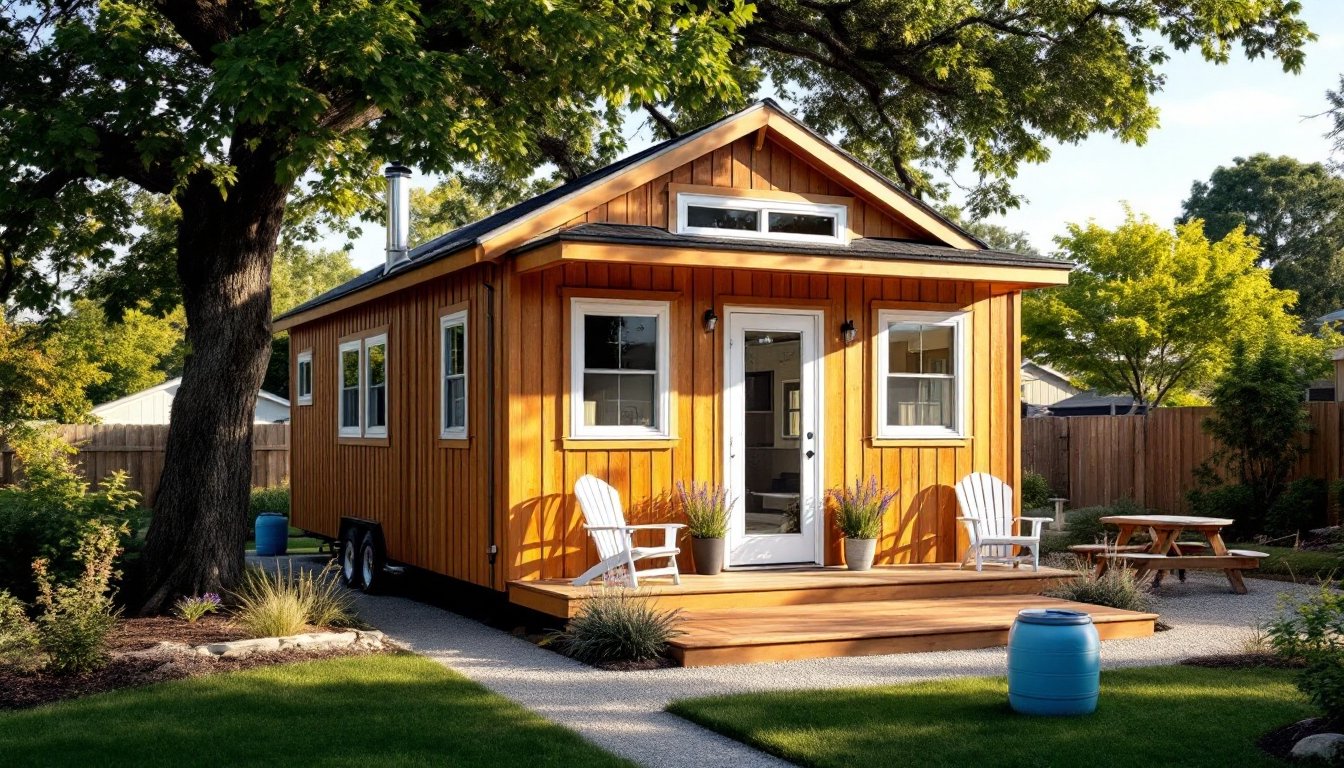
ToggleA 12×24 tiny home isn’t just a downsizing trend, it’s a practical solution for anyone seeking affordable housing, a backyard guest suite, or a mortgage-free life. At 288 square feet, this footprint sits at the upper edge of “tiny” living, offering enough room for a full kitchen, bathroom, sleeping loft, and living area without requiring a CDL to tow it. Unlike 8×20 models that demand ruthless minimalism, a 12×24 tiny house gives you breathing room to cook, work, and host a friend or two. It’s also wide enough to avoid the road restrictions that plague larger builds, while still fitting on most residential lots zoned for accessory dwelling units. Whether you’re building from scratch or adapting plans, this size hits a sweet spot between livability and simplicity.
Key Takeaways
- A 12×24 tiny home at 288 square feet provides the ideal balance between livability and affordability, offering enough space for a full kitchen, bathroom, and separate sleeping area without requiring special permits or towing restrictions.
- The 12-foot width and 24-foot length dimensions work cleanly with standard building materials, reducing construction waste and simplifying structural requirements compared to smaller or larger tiny house models.
- Smart design strategies like vertical storage, multipurpose furniture, and strategic lighting transform the compact footprint into a functional home where residents report comfort after a 3–6 month adjustment period.
- Building costs range from $20,000 to $60,000 depending on finish level and labor, with foundation/trailer ($2,000–$7,000) and kitchen/bathroom components representing the largest expenses.
- Zoning and permitting rules vary dramatically by jurisdiction; a 12×24 tiny home may qualify as an accessory dwelling unit (ADU) rather than a primary residence, so verify local regulations before purchasing land or materials.
- Successful 12×24 tiny home living requires ruthless editing of possessions, establishing functional zones, embracing outdoor living space, and managing moisture through proper ventilation and climate control.
Why Choose a 12×24 Tiny Home Layout?
The 12×24 footprint delivers distinct advantages over both smaller and larger alternatives. At 288 square feet, it’s large enough to accommodate full-size appliances, a 30-inch range, standard refrigerator, and washer/dryer combo, without resorting to RV-grade miniatures that break within two years. The 12-foot width allows for a center hallway or galley kitchen without the cramped sideways shuffle common in 8-foot-wide trailers.
From a construction standpoint, the dimensions work cleanly with standard building materials. Roof trusses span 12 feet without engineered support, and 24 feet divides evenly into 2-foot layout increments, minimizing lumber waste. Floor joists at 2×8 or 2×10 (depending on span tables and load) handle the width comfortably when spaced at 16 inches on-center.
This size also dodges many towing headaches. While it’s possible to build a 12×24 on a trailer, most owners opt for a permanent foundation or skids, avoiding DOT width restrictions and the need for oversize load permits. For those pursuing the accessory dwelling unit (ADU) route, 288 square feet often falls within local size caps that allow streamlined permitting, though that varies widely by jurisdiction.
Finally, the layout supports resale and rental potential. A 12×24 tiny house floor plan can include a separate bedroom (not just a loft), which appeals to buyers who can’t or won’t climb a ladder nightly. That flexibility translates to better financing options and broader market appeal if you ever sell.
Design Essentials for Maximizing Your 288 Square Feet
Smart design turns a small footprint into a functional home. Start by identifying non-negotiables: Do you need a ground-floor bedroom, a full bathtub, or a dedicated workspace? Those decisions shape everything else.
Vertical space is your best friend. Standard 8-foot interior ceilings feel cramped: bump to 9 or 10 feet if your budget allows. That extra height accommodates storage lofts, hanging pot racks, and wall-mounted fold-down desks without crowding sight lines. Cathedral ceilings with exposed collar ties add volume, though they complicate insulation details.
Multipurpose zones prevent wasted square footage. A dining table that doubles as a work surface, a sofa with underfloor storage drawers, or a murphy bed that folds into a wall cabinet, all reclaim space when not in use. Avoid furniture marketed as “tiny house specific”: it’s often overpriced. Instead, scour IKEA, Wayfair, or used furniture stores for compact pieces with integrated storage.
Lighting matters more than you’d think. Recessed LED cans (4-inch trim) keep ceilings uncluttered, while under-cabinet strips brighten counters without eating into headroom. Install dimmer switches on all overhead lighting to adjust mood and perceived space.
For plumbing and electrical, cluster wet areas (kitchen, bath, laundry) along one wall to simplify drain and supply runs. This saves money on materials and reduces the chance of leaks traveling through framing. If you’re planning radiant floor heat, lay PEX tubing during the subfloor stage, it’s nearly impossible to retrofit later.
Floor Plan Options and Layout Configurations
There’s no one-size-fits-all 12×24 tiny house floor plan, but a few archetypes dominate:
1. Loft + Ground Floor Bath
The classic layout: main living and kitchen downstairs, sleeping loft above the bathroom. This frees up the most usable floor space but requires a steep ship’s ladder or alternating-tread stair. Not ideal for anyone with mobility issues or kids under five.
2. Split-Level with Separate Bedroom
Divide the 24-foot length into roughly 12 feet for living/kitchen and 12 feet for a ground-floor bedroom and bath. Add a small loft over the bedroom for storage or a reading nook. This layout suits couples, retirees, or anyone who wants a door between sleeping and living areas. Many successful small space living ideas emphasize the importance of defined zones, even in compact footprints.
3. Open Studio with Flexible Partitions
Skip permanent walls in favor of sliding barn doors, curtains, or bookcases on casters. The entire 288 square feet becomes one fluid space that adapts to your day, office by morning, yoga studio by afternoon, dining room by evening. Works best for solo dwellers or minimalists who don’t accumulate much gear.
4. Tandem Layout for Two
Place bathrooms and sleeping areas at opposite ends with the kitchen and living space in the center. Gives each person a private retreat, handy for roommates or couples with different schedules. Requires two entry doors or a long hallway, which eats into usable square footage.
Draft your layout on graph paper (¼-inch scale) or use free tools like SketchUp or Floorplanner. Mark door swings, appliance clearances (fridges need 1 inch at sides and top for ventilation), and furniture footprints to catch conflicts before framing begins.
Building a 12×24 Tiny Home: What You Need to Know
Building a 12×24 tiny home demands the same attention to structure and systems as a full-size house, just condensed. If you’re new to construction, partner with someone experienced or hire a general contractor for at least the framing and rough-in stages. Mistakes in these phases are expensive to fix later.
Foundation choices break into three camps: permanent slab-on-grade, pier-and-beam, or trailer. A 4-inch slab over compacted gravel and vapor barrier works for mild climates and level lots. Budget ~$1,200–$2,000 for concrete, rebar, and labor (prices vary regionally). Pier-and-beam using concrete deck blocks or helical piers suits sloped sites and keeps the structure off damp ground: frame the floor with 2×8 or 2×10 pressure-treated joists at 16 inches on-center. Trailer builds require a custom steel frame from a tiny house trailer manufacturer, expect $4,500–$7,000 depending on axle count and gooseneck vs. bumper-pull design.
Wall framing typically uses 2×4 studs at 16 inches on-center for non-load-bearing partitions and 2×6 exterior walls if you want R-20+ insulation. Advanced framing techniques (24-inch centers, single top plates, two-stud corners) cut lumber costs and boost thermal performance, but check your local building code, some jurisdictions still mandate 16-inch spacing for wind or seismic loads.
Roofing can be a simple gable, shed, or gambrel. A gable with 4:12 or 5:12 pitch sheds rain and snow effectively while keeping ridge height under 13.5 feet, important if you’re staying within trailer height limits or local setback rules. Use architectural shingles (30-year rating) for durability: metal roofing adds upfront cost but lasts 50+ years and reflects heat in hot climates.
Insulation and air sealing can’t be skipped. Spray foam (closed-cell, R-6 per inch) costs more but seals gaps and adds racking strength. Mineral wool batts (Roxul or equivalent) offer R-15 in a 2×4 wall and are easier for DIYers to install. Regardless of type, seal all penetrations, electrical boxes, plumbing chases, window flanges, with canned foam or acoustical sealant before hanging drywall.
Electrical and plumbing should follow the National Electrical Code (NEC) and International Residential Code (IRC), even if your jurisdiction doesn’t require inspection. That means GFCI protection for kitchen and bath outlets, dedicated 20-amp circuits for the fridge and microwave, and proper venting for drain lines (typically 1.5-inch or 2-inch ABS or PVC with a 2-inch vent stack through the roof). If you’re off-grid, size your solar array and battery bank for realistic loads, an electric water heater and resistance space heater will drain even a robust system quickly.
Don’t skip a second pair of hands when standing walls, setting trusses, or lifting sheathing panels. A 4×8 sheet of ½-inch OSB weighs ~50 pounds: trying to muscle it solo leads to crooked nails and sore backs.
Cost Breakdown and Budget Planning
Total costs for a 12×24 tiny home range widely, $20,000 to $60,000 depending on finish level, location, and whether you’re swinging a hammer yourself or hiring out. Here’s a rough breakdown assuming mid-grade materials and owner-builder labor for about half the work:
Foundation/Trailer: $2,000–$7,000
Framing Lumber (studs, joists, trusses): $3,000–$5,000
Exterior Sheathing & Siding: $2,500–$4,000
Roofing (shingles, underlayment, drip edge): $1,200–$2,000
Windows & Doors: $1,500–$3,500 (expect to pay more for energy-efficient or custom sizes)
Insulation: $800–$2,000
Drywall, Tape, Mud, Paint: $1,200–$1,800
Electrical (wire, boxes, panel, fixtures): $1,500–$2,500
Plumbing (PEX, fixtures, water heater): $1,800–$3,000
Kitchen (cabinets, countertop, sink, appliances): $2,500–$6,000
Bathroom (tub/shower, toilet, vanity, tile): $1,500–$3,000
Flooring: $800–$1,500
Miscellaneous (fasteners, adhesives, permits, tools): $1,500–$3,000
If you hire a general contractor for the entire build, multiply the material costs by roughly 2.5 to 3 to cover labor, overhead, and profit. Some owners save money by doing finish work, painting, trim, cabinet install, while leaving framing and mechanicals to pros.
Material prices fluctuate. Lumber spiked dramatically in 2021–2022 and has since moderated but remains above pre-pandemic levels in many regions. Shop local lumberyards and big-box stores (Home Depot, Lowe’s, Menards) and compare: smaller yards sometimes beat chain pricing on bulk orders. Buy windows and doors during off-season sales (late fall/winter) when demand slows.
Budget for 10–15% contingency. You’ll hit surprises, rot discovered during demo, incorrect measurements, last-minute design changes. That cushion keeps the project moving without maxing out credit cards.
Zoning, Permits, and Legal Considerations
Zoning and permitting rules are the wild card in any tiny home project. They vary not just state-to-state but county-to-county and even lot-to-lot within the same city. Start by calling your local planning or building department before buying land or materials. Ask specifically about:
- Minimum dwelling size: Some jurisdictions set a floor of 400, 600, or even 1,000 square feet for primary residences. A 288-square-foot structure may only qualify as an accessory dwelling unit (ADU), guest house, or studio, which means you’ll need an existing primary residence on the same parcel.
- Setbacks and lot coverage: Even if tiny homes are allowed, setback rules (distance from property lines, roads, and other structures) and maximum lot coverage percentages can dictate where you can place the building.
- Foundation requirements: Structures on permanent foundations typically face stricter code enforcement than those on skids or trailers classified as “temporary.” Ironically, that can make permitting easier, or harder, depending on local attitudes.
- Utilities and septic: Off-grid systems (composting toilets, rainwater catchment, solar power) aren’t universally legal. Many codes require connection to municipal water/sewer or an approved septic system, which adds cost and complexity.
If your tiny home is on a trailer, some owners register it as an RV and park it in RV-friendly zones or on private land with owner permission. This sidesteps building codes but may limit financing options and insurance coverage. It also means you’re technically living in a vehicle, which some municipalities restrict or prohibit outright for extended periods.
Building permits generally apply to structures over 120–200 square feet (depending on jurisdiction). Expect to submit stamped plans from a licensed engineer or architect, especially for anything on a trailer or in a high-wind/seismic zone. Permit fees run $500–$2,000, and inspections will cover foundation, framing, electrical, plumbing, insulation, and final. Don’t skip permits to save money, unpermitted structures can be condemned, and you’ll face steep fines and difficulty selling or insuring the property.
Some states and cities have adopted tiny-house-friendly ordinances, Fresno, CA: Spur, TX: and parts of Oregon and Colorado have explicit allowances. Research advocacy groups like the American Tiny House Association for up-to-date resources.
If zoning or codes feel overwhelming, hire a local contractor or expeditor familiar with the process. They’ll know which inspectors are flexible, which details trigger red flags, and how to phrase applications for best results. Worth every penny if it prevents a project shutdown halfway through.
Living Comfortably in a 12×24 Space: Tips and Tricks
Once the walls are up and the paint’s dry, the real work begins: learning to live well in 288 square feet. The difference between a cramped closet and a cozy retreat comes down to habits, not just design.
Edit ruthlessly. The one-in-one-out rule isn’t negotiable in a tiny home. Every new book, kitchen gadget, or pair of shoes means something else has to go. Digitize paperwork, photos, and media. Resist “just in case” items, if you haven’t used it in six months, donate or sell it. Adopting effective home organization tips early prevents clutter from creeping back in.
Establish zones. Even without walls, define areas by function: a corner for work, a nook for reading, a spot for shoes and coats. Rugs, lighting, and furniture arrangement create mental boundaries that help your brain shift gears throughout the day.
Go vertical for storage. Floor space is precious: wall and ceiling space is abundant. Install floating shelves, pegboards, and magnetic knife strips. Hang bikes, kayaks, or skis from ceiling hooks. Use the space above doorways for narrow shelving, perfect for books or seldom-used kitchen items.
Embrace outdoor living. A 12×24 footprint feels twice as large when you add a deck, patio, or screened porch. Cook outside on a grill or portable induction burner during good weather. Eat, work, and entertain al fresco. Many budget home renovation stories highlight how outdoor extensions dramatically improve small-space livability.
Manage moisture and ventilation. Small spaces concentrate humidity from cooking, showering, and breathing. Run a bathroom exhaust fan (vented to the exterior, not into the attic) during and after showers. Crack a window when cooking. In cold climates, a small dehumidifier prevents condensation and mold.
Heat and cool efficiently. A mini-split heat pump (9,000–12,000 BTU) handles both heating and cooling in most climates and runs on a single 20-amp circuit. Supplement with a small propane or wood stove if you’re off-grid. Insulate well and seal air leaks: it’s far cheaper to prevent heat loss than to generate more heat.
Invite people over. Tiny living doesn’t mean hermit living. A well-designed 12×24 can comfortably host a dinner party for four or a movie night for six if you’re creative with seating. Folding chairs, floor cushions, and a collapsible dining table make it happen.
Finally, give yourself grace during the adjustment period. The first few months will feel tight. You’ll bump into corners, forget where you stashed the colander, and second-guess the whole project. Stick with it. Most tiny home dwellers report that after three to six months, the space starts to feel just right, and the freedom from a mortgage or rent feels even better.