
Table of Contents
ToggleSkip the overpriced tickets, sticky floors, and twelve dollars for popcorn. A budget home theater room delivers the cinematic experience without the recurring costs, and it’s more achievable than most homeowners think. With the right layout, a few smart equipment choices, and some DIY acoustic treatment, anyone can transform a spare bedroom, basement corner, or finished garage into a screening room that rivals commercial theaters. The key is knowing where to spend, where to save, and which upgrades actually matter. This guide walks through every step, from planning the space to avoiding common pitfalls that blow budgets.
Key Takeaways
- A budget home theater room can be created for under $1,500 with smart equipment choices and careful planning, delivering cinema-quality sound and picture without recurring ticket costs.
- Rectangular room layouts with length-to-width ratios between 1.6:1 and 2.35:1 reduce acoustic issues, while proper screen sizing and seating distance are essential for optimal viewing.
- Audio quality separates great budget setups from mediocre ones—invest in a 5.1 receiver, matched speaker sets, and a quality subwoofer rather than relying on soundbars.
- DIY acoustic treatment using rigid fiberglass insulation, soft furnishings, and strategically placed bass traps costs a fraction of commercial panels and significantly improves sound clarity.
- Speaker placement matters more than brand—front channels must flank the screen at ear level, the center channel directly above or below it, and surrounds positioned behind seating.
- Common budget mistakes include skipping acoustic treatment, undersizing the subwoofer, buying mismatched speakers, and forgetting ventilation for heat-generating equipment.
Planning Your Budget Home Theater Layout
Start with the room. Rectangular spaces work better than square ones, they reduce standing sound waves that muddy audio. Measure the dimensions carefully and aim for a length-to-width ratio between 1.6:1 and 2.35:1 if the homeowner has options.
Viewing distance dictates screen size. For a 1080p display, multiply the screen width by 1.5 to 2.5 for optimal seating distance. For 4K, viewers can sit closer, about 1 to 1.5 times the screen width. A 65-inch screen works well for seats 8 to 10 feet away.
Block ambient light. Windows need blackout curtains or foam board inserts. Light bleed from hallways or adjacent rooms kills contrast and washes out dark scenes. If the door doesn’t seal well, add weatherstripping, it also helps with sound isolation.
Electrical planning matters early. Count outlets needed for the display, receiver, streaming device, subwoofer, and any accent lighting. Most rooms need at least two dedicated circuits to avoid tripped breakers during movie night. If adding outlets or running new circuits, that work requires a permit and possibly an electrician, depending on local codes and comfort level with the NEC.
Essential Equipment for Under $1,500
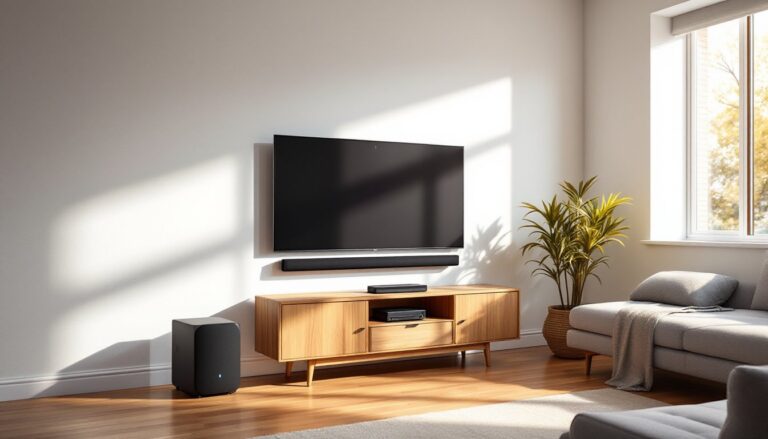
The display is the biggest decision. Projectors deliver the most screen size per dollar, 110-inch images are common, but they require a dark room and a blank wall or pull-down screen. Budget 1080p projectors start around $400. Large TVs (65 to 75 inches) range from $500 to $900 and work in rooms with some ambient light. For the cinematic feel, projectors win.
Audio separates budget setups from great ones. Skip soundbars. A basic 5.1 receiver ($200 to $300) powers separate speakers and decodes surround formats like Dolby Digital. Pair it with a set of bookshelf speakers for front left/right and center channels ($150 to $250 for a matched set), budget surrounds ($80 to $120), and a powered subwoofer ($150 to $250). Used or refurbished gear from reputable retailers stretches the budget further.
Several budget home theater systems now include wireless rear speakers, which simplify installation in rooms where running speaker wire is impractical.
For source components, a streaming stick or box ($30 to $100) handles most content. Roku, Fire TV, and Chromecast all deliver 4K and HDR when paired with compatible displays. Physical media fans can add a used Blu-ray player for under $50.
Budget breakdown example:
- Projector or 65″ TV: $500
- 5.1 receiver: $250
- Speaker package: $350
- Subwoofer: $200
- Streaming device: $50
- Cables and mounts: $100
- Total: $1,450
Affordable Acoustic Treatment Solutions
Bare walls, hardwood floors, and large windows turn a room into an echo chamber. Acoustic treatment doesn’t require foam pyramids or studio-grade panels. Start with the basics.
Soft furnishings absorb sound. A thick area rug over hard flooring reduces reflections. Heavy curtains on windows and bare walls dampen high frequencies. Even a bookshelf filled with books acts as a diffuser, scattering sound waves instead of reflecting them cleanly.
DIY acoustic panels cost a fraction of commercial versions. Buy rigid fiberglass insulation (Owens Corning 703 or Roxul Safe’n’Sound, about $1 per square foot) and wrap it in breathable fabric from a fabric store. Build simple frames from 1×4 furring strips ($2 to $3 per 8-foot length), staple the fabric taut, and hang the panels at reflection points, the side walls where sound bounces from speakers to the listening position.
Bass traps go in corners where low frequencies build up. A triangular frame filled with the same rigid insulation and covered in fabric handles most issues. Two to four corner traps make a noticeable difference in clarity.
Skip the egg crates and moving blankets. Egg crates do almost nothing, and moving blankets block sound from leaving a room but don’t improve what listeners hear inside it.
Safety note: Wear gloves, long sleeves, and a dust mask when cutting and handling fiberglass insulation. The fibers irritate skin and lungs.
DIY Seating and Decor on a Shoestring
Theater seating isn’t necessary. A comfortable couch or a pair of recliners work fine and cost less. Thrift stores, estate sales, and Craigslist often have clean, deep-cushion sofas for $100 to $300.
For a stadium-seating effect without construction, build a simple riser platform for the back row. Frame it with 2x4s on 16-inch centers (standard stud spacing), screw down a 3/4-inch plywood top, and carpet it. A 4-foot by 8-foot riser about 8 inches tall costs around $60 in materials. Make sure it’s sturdy, no wobble, and fasten it to wall studs if it’s tall enough to be a tipping hazard.
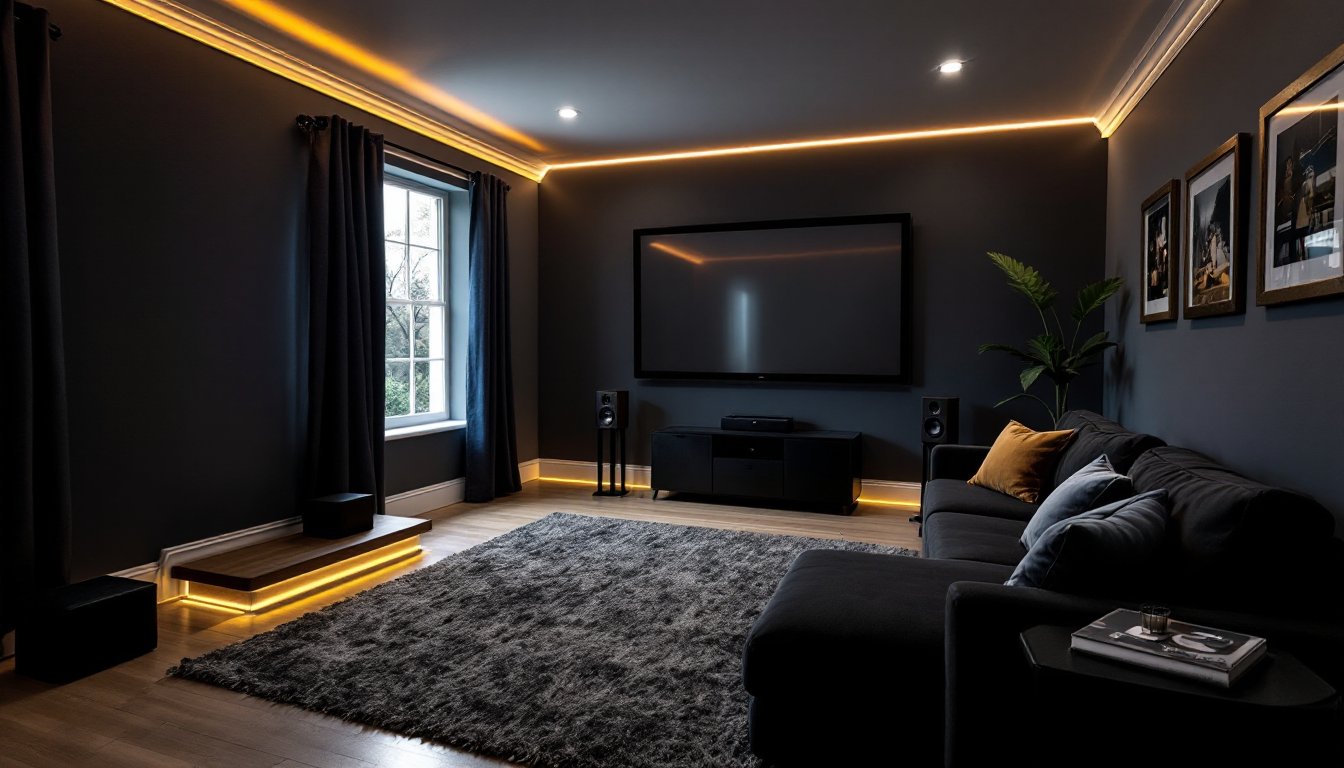
Blackout paint or dark wall colors reduce reflections and improve the perceived contrast of the screen. Flat or matte finishes work better than glossy. Deep blues, grays, or charcoal tones set the mood without going full black, which some find oppressive.
Decorative touches like movie posters in cheap frames, string lights tucked behind crown molding, or a popcorn cart from a garage sale add personality for under $100 total. Many budget-friendly furniture hacks turn modular shelving or TV stands into custom media centers with minimal tools and effort.
Lighting and Ambiance Without Breaking the Bank
Overhead lights should dim or turn off entirely during viewing. A basic dimmer switch ($15 to $30) replaces a standard switch in about fifteen minutes. Turn off the breaker first, always.
Bias lighting behind the display reduces eye strain and improves perceived contrast. A USB-powered LED strip ($10 to $20) mounted on the back of the TV or along the projector screen frame works perfectly. Stick with neutral white (6500K) for accurate color perception, not color-changing RGB strips that distract more than they help.
Sconces or floor lamps with warm, low-wattage bulbs (25 to 40 watts equivalent in LED) provide enough light for safe movement without washing out the screen. Place them behind or to the side of seating, not facing the display.
For a professional touch, install rope lighting or LED strips along baseboards or under riser platforms. These cast a soft glow that defines walkways and looks intentional. Use adhesive-backed strips and tuck wiring behind trim or inside cord channels.
Smart bulbs and plugs (starting at $10 each) let users control lighting scenes from a phone or voice assistant. Set one scene for “movie mode” that dims or shuts off all lights and another for “intermission” that brings them back up. This level of control was expensive a few years ago: now it’s standard.
Common Mistakes to Avoid When Building on a Budget
Skipping speaker placement. Even great speakers sound mediocre in the wrong spot. Front left and right speakers should flank the screen at ear level, angled inward. The center channel goes directly above or below the screen. Surrounds sit slightly behind and above the seating area. Many homeowners comparing top budget home theater setups find that placement matters more than brand.
Ignoring room acoustics. All the gear in the world won’t fix a room that echoes or booms. Treat the space before upgrading equipment.
Buying mismatched speakers. The front three channels (left, center, right) should match or come from the same product line. Timbre mismatch sounds disjointed when sound pans across the screen.
Undersizing the subwoofer. Bass is expensive to produce. A cheap, underpowered subwoofer distorts and rattles. Save a bit more or buy used from a known brand like BIC, Klipsch, or Dayton Audio.
Overbuying cables. Overpriced HDMI and speaker cables don’t improve performance. Standard HDMI cables certified for the needed bandwidth (2.0 for 4K HDR, 2.1 for 4K/120Hz) work fine. Speaker wire? Twelve or fourteen-gauge from the hardware store does the job for under a dollar a foot.
Forgetting ventilation. Projectors and receivers generate heat. Closed cabinets without airflow cause overheating and shorten equipment life. Leave space or add small fans.
Conclusion
A budget home theater doesn’t mean settling for poor quality. With careful planning, smart equipment choices, and a few DIY projects, homeowners can build a space that delivers immersive sound, a cinematic picture, and the comfort of home, all for what a family would spend on a few months of movie tickets. The best part? It’s a project that improves with time as upgrades and tweaks refine the experience.