
Table of Contents
TogglePlanning a remodel without the right software is like framing a wall without a level, you’ll get somewhere, but probably not where you intended. Home remodeling software has evolved from clunky CAD programs into intuitive tools that let homeowners visualize changes, estimate costs, and catch design mistakes before the first board gets cut. Whether you’re tackling a kitchen gut or a basement conversion, the right digital toolkit can save thousands in material waste and costly mid-project pivots. This guide breaks down what these programs actually do, which features matter for DIY projects, and how to pick one that matches your skill level and budget.
Key Takeaways
- Home remodeling software allows homeowners to visualize designs, estimate costs, and catch mistakes before construction begins, potentially saving thousands in material waste and costly mid-project changes.
- Essential features in remodeling software include 2D/3D visualization, material libraries, precise measurement tools, cost estimation, and export options for sharing plans with contractors and building departments.
- Free or budget-friendly options like SketchUp Free and RoomSketcher work well for DIY projects, while premium solutions like Chief Architect Pro are worth the investment for structural work and complex remodels.
- Accurate measurements of existing space using a laser measure, combined with mapping utility locations, are critical first steps before building your digital model in remodeling software.
- Use the software’s 3D visualization to test multiple layout iterations, check clearances, and catch spatial issues like sight-line problems and code violations before demolition begins.
- Treat cost estimates from remodeling software as baseline comparisons rather than exact bids, as local pricing, material choices, and regional factors affect final project costs.
What Is Home Remodeling Software and Why You Need It
Home remodeling software is a digital platform that lets users design, visualize, and plan renovation projects before touching a hammer. These tools range from basic room layout apps to full 3D modeling suites that handle everything from electrical runs to finish schedules.
Most programs let homeowners drag-and-drop walls, windows, and fixtures to test layouts. Better ones calculate material quantities, generate cut lists, and flag code issues like minimum egress window sizes or required outlet spacing. Some integrate cost databases so you can see how swapping quartz for laminate affects the bottom line in real time.
The main reason to use remodeling software? Mistakes on screen cost nothing. Moving a load-bearing wall in your design takes two clicks. Moving it in reality means engineering fees, a beam, posts, footings, and a permit. Software lets DIYers experiment with fixture placement, test paint colors in different light, and catch spatial problems, like a door that swings into a toilet, before demolition starts.
For permit-required work, many programs export floor plans and elevations that building departments accept. That alone can speed up approval and reduce back-and-forth with inspectors. Even if you’re hiring out the structural work, walking into a contractor meeting with a dimensioned plan and a material list puts you in control of the conversation and the budget.
Essential Features to Look for in Remodeling Software
Not all remodeling software is built the same. Here’s what separates the useful from the gimmicky:
2D and 3D visualization. A floor plan view (2D) is essential for layout and measurements. 3D walk-throughs help homeowners see sight lines, understand ceiling height changes, and preview finishes. If the software can’t render both, it’s incomplete.
Material and fixture libraries. Pre-loaded catalogs of cabinets, appliances, windows, and trim save hours of manual dimensioning. Look for libraries that include actual product dimensions, not just generic placeholders. Some platforms partner with manufacturers so you can drop in the exact KitchenAid range or Pella window you’re buying.
Measurement and dimensioning tools. The program should let users input precise measurements and display them on plans. Auto-dimensioning features speed things up, but manual override is critical for odd spaces or existing homes that aren’t perfectly square.
Cost estimation. Built-in cost databases, often sourced from regional project estimates, give ballpark numbers for materials and labor. These aren’t contractor bids, but they help set realistic budgets and compare options. Expect accuracy within 15–25%, depending on local pricing and material grades.
Export and sharing options. PDF or image export is a baseline. Better tools let you share links, export to CAD formats, or generate material lists in spreadsheet form. If you’re working with a contractor, ask what file types they prefer before committing to a platform.
Mobile access. Being able to pull up your plan on-site, while standing in the framed space or at the lumberyard, is invaluable. Cloud sync across devices keeps everything current.
Collaboration features. If a spouse, contractor, or designer is involved, look for real-time sharing and comment tools. Version history prevents the headache of losing a good layout because someone saved over it.
Top Home Remodeling Software Options for DIYers and Homeowners
Free and Budget-Friendly Tools
SketchUp Free is the go-to for DIYers comfortable with a learning curve. The browser-based version is free and powerful enough for full room models, furniture placement, and basic material takeoffs. The interface isn’t as intuitive as drag-and-drop apps, but YouTube tutorials are plentiful. SketchUp shines for custom built-ins, deck designs, and any project where you need to model exact dimensions. Export options are limited in the free tier, but screenshots and PDFs work for most permit submittals.
RoomSketcher offers a free tier with 2D/3D floor plans and a decent fixture library. It’s ideal for layout experiments and finish visualization. The free version watermarks exports, but it’s enough to test ideas before committing. Paid plans start around $49/year and unlock high-res images, better rendering, and cost estimates.
HomeByMe is another browser-based option with no download required. The free version allows unlimited projects and includes a solid catalog of furniture and finishes. 3D rendering quality is good enough to share with family or a designer. The interface is more user-friendly than SketchUp, making it a strong pick for first-timers.
Premium Professional-Grade Solutions
Chief Architect is the standard for serious remodelers and design-build pros, but the Home Designer line scales down for homeowners. Home Designer Interiors (around $99) handles room layouts, finish schedules, and 3D rendering. Home Designer Pro (around $500) adds framing tools, cross-sections, and code-checking features. If you’re doing structural work, adding a bump-out, raising a ceiling, or reconfiguring a load path, the Pro version pays for itself by catching issues early.
Punch. Home & Landscape Design (around $130) is a solid middle-ground option for Windows users. It includes 2D/3D design, a large object library, and cost estimating. The learning curve is steeper than web apps but shallower than Chief Architect. It’s well-suited for whole-home projects where you’re juggling multiple rooms and exterior changes.
Live Home 3D is the best option for Mac and iOS users who want native performance. Plans start around $30 for the basic version, with the Pro edition (around $70) adding advanced rendering and export options. The interface feels familiar to Apple users, and the AR feature lets you view designs in actual space using your phone’s camera.
Houzz Pro is built for contractors and designers, but homeowners working with pros often encounter it. It’s overkill for pure DIY, but if you’re coordinating with a designer, Houzz’s platform handles proposals, invoicing, and project timelines alongside design tools. The free Houzz app remains a top resource for inspiration photos and product sourcing, even if you’re not using their pro tools.
How to Use Remodeling Software to Plan Your Project Successfully
Start by measuring the existing space accurately. Use a laser measure for speed and precision, they’re under $40 and eliminate cumulative tape measure errors. Record ceiling heights, window rough openings, door swings, and any offsets or out-of-square walls. Old houses are rarely plumb: measure in multiple spots.
Input those dimensions into your software before adding any design elements. If you’re working with existing framing, note stud and joist locations. For kitchens and baths, map out drain and supply lines, moving plumbing is expensive, so designs that reuse existing rough-in locations save thousands.
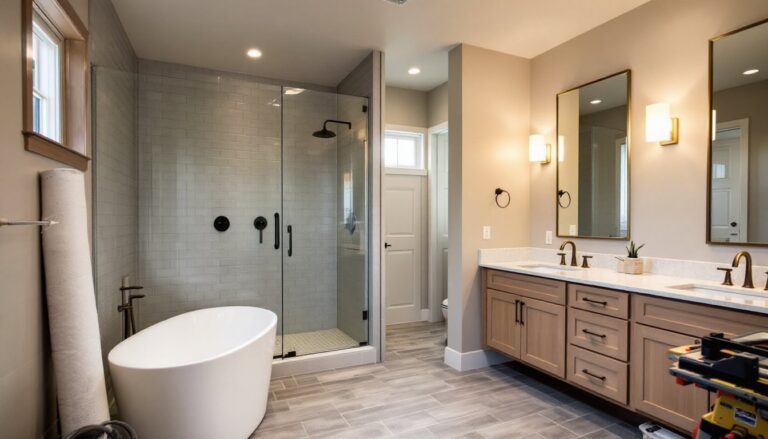
Once the base model is built, start layering in changes. Test multiple layouts before settling. Move the island three times. Flip the shower and vanity. Swap the window sizes. Software makes iteration free, so use it. Check clearances as you go: 36 inches minimum for walkways, 30 inches in front of appliances, and code-required distances around toilets and showers.
Use the 3D view to catch sight line issues. Can you see the toilet from the living room? Does the range hood block the window? Will that beam create a head-knocker at the bottom of the stairs? Walk through the space virtually from multiple angles.
Generate a material list once the design is locked. Cross-reference it with actual product specs, software databases aren’t always current. For structural lumber, remember nominal vs. actual sizing: a 2×4 is actually 1.5″ × 3.5″. For finish materials, add 10–15% waste for cuts and mistakes.
Export your plans in multiple formats. Keep a PDF for your records, share a link with anyone providing input, and confirm file compatibility if you’re handing plans to a contractor or permit office. Some jurisdictions require sealed drawings for structural work, but most accept homeowner-drawn plans for non-structural permits like kitchen remodels or bath updates.
Use cost estimates as a reality check, not gospel. Software pricing databases reflect national or regional averages, but your ZIP code, material choices, and timing all shift numbers. Treat software estimates as a baseline for comparison, if one layout costs 40% more than another, that spread will likely hold even if absolute numbers vary.
Conclusion
Home remodeling software won’t swing the hammer, but it will keep you from swinging it in the wrong spot. The right tool turns vague ideas into buildable plans, highlights costly mistakes before they happen, and gives you the confidence to tackle ambitious projects. Start with a free option to test the workflow, then upgrade if the project scope or your comfort level demands it. Measure twice, model once, and build with a plan that’s already been debugged.