
Table of Contents
ToggleBuilding a tiny home isn’t just a housing trend, it’s a legitimate path to affordable homeownership, simplified living, and financial freedom. Whether someone’s aiming for a 120-square-foot micro cabin or a more spacious 400-square-foot dwelling, the process demands careful planning, honest assessment of skills, and a clear understanding of local regulations. This isn’t a weekend project. A typical owner-builder timeline runs 6 to 12 months, depending on complexity and available hours. But for those willing to learn framing, basic plumbing, and electrical work, the payoff is substantial: a custom home built for a fraction of traditional construction costs.
Key Takeaways
- Building a tiny home costs $15,000 to $45,000 in materials when owner-supplied, with timeline of 6 to 12 months depending on complexity and skill level.
- Zoning laws vary drastically by jurisdiction—contact your local planning department early to determine whether tiny homes are classified as RVs, ADUs, or banned outright.
- Trailer-based builds offer mobility but require proper bolting and low center of gravity, while permanent foundations demand concrete slabs or pier-and-beam systems with frost-depth compliance.
- Mechanical systems including electrical (100–200-amp service), plumbing (PEX tubing with proper slope), and HVAC (mini-split heat pumps) are essential and code-regulated, not optional.
- Interior finishing should maximize space efficiency through compact appliances, vertical storage, lightweight materials, and multi-purpose furniture in your tiny home layout.
Planning Your Tiny Home: Budget, Design, and Zoning Considerations
Before buying a single 2×4, the builder needs three things locked down: budget, design, and legal clearance.
Budget reality check: Material costs for a DIY tiny home typically range from $15,000 to $45,000, depending on size, finishes, and whether it’s on wheels or a permanent foundation. That figure assumes the builder is providing labor. Hiring out framing, electrical, or plumbing can double the budget. Track every expense, lumber, fasteners, windows, insulation, appliances, and permits all add up faster than expected.
Design parameters: Most tiny homes fall between 100 and 400 square feet. Trailer-based builds are limited by road width (8.5 feet max without special permits) and towing capacity. Permanent foundations offer more flexibility but trigger different code requirements. Sketch the floor plan to scale, accounting for ceiling height (many tiny homes use lofts, which require 3 to 4 feet of clearance), door swings, and appliance dimensions. Don’t forget to plan storage, every cubic inch counts.
Zoning and permits: This is where many DIY projects stall. Zoning laws vary wildly by jurisdiction. Some municipalities classify tiny homes as RVs (requiring RV park placement), others as accessory dwelling units (ADUs) with specific lot requirements, and some ban them outright. Call the local planning department early. Ask about minimum square footage requirements, setback rules, and whether a Certificate of Occupancy is required. Permanent foundations nearly always require building permits and inspections for electrical, plumbing, and structural work. Trailer-based homes may bypass some codes if certified through the Recreational Vehicle Industry Association (RVIA) or as a Park Model RV, but that certification process has its own costs and design constraints.
Choosing the Right Foundation and Frame for Your Tiny House
The foundation decision shapes everything: mobility, cost, code requirements, and structural approach.
Trailer vs. Permanent Foundation
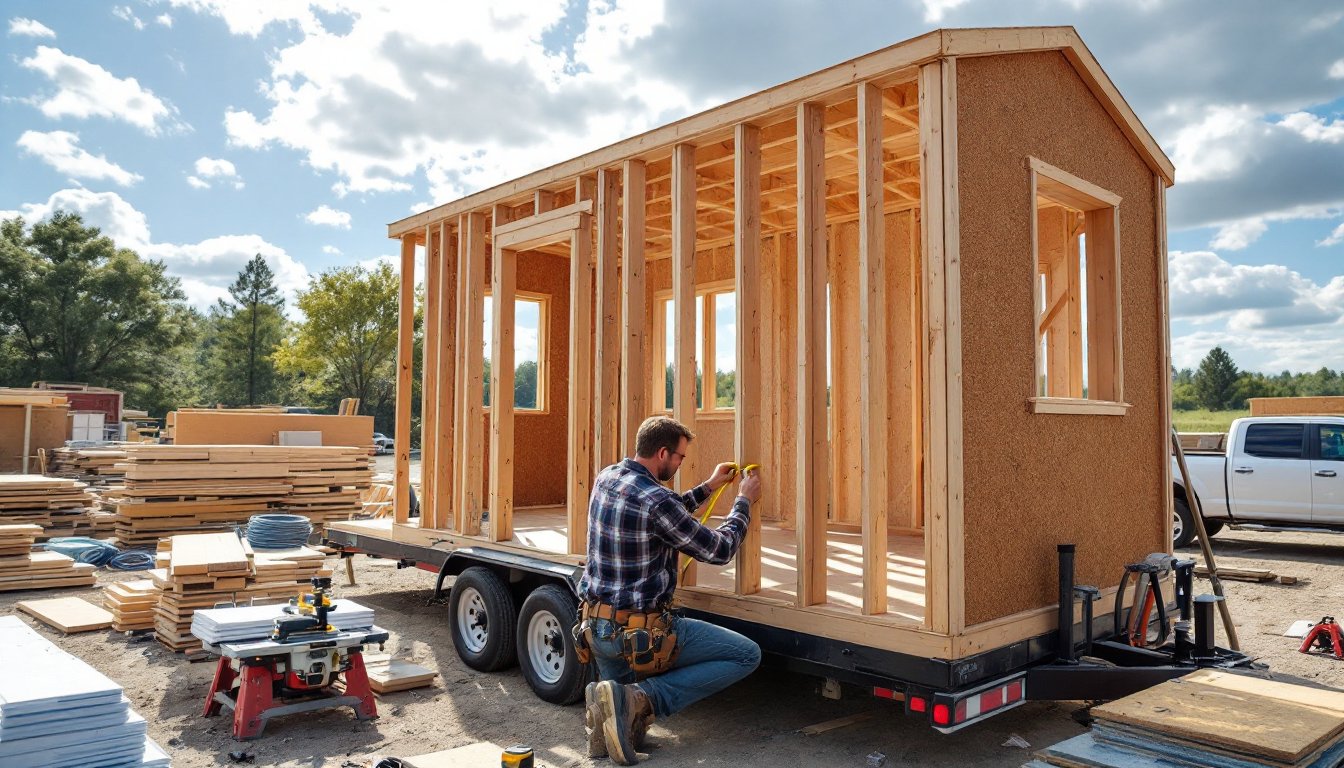
Trailer builds offer mobility and often sidestep residential building codes. A heavy-duty flatbed trailer rated for 10,000+ pounds is the typical starting point. Brands like Iron Eagle and Tumbleweed sell trailers engineered specifically for tiny homes, with built-in tie-down points and proper weight distribution. The frame must be bolted securely to the trailer using lag bolts and steel brackets, this is a life-safety issue during transport. Framing typically uses 2×4 studs on 16-inch centers for walls and 2×6 or engineered lumber for the floor to handle point loads and road vibration. Keep the center of gravity low: top-heavy builds are dangerous to tow.
Permanent foundations include concrete slabs, crawl spaces, and pier-and-beam systems. A 4-inch concrete slab on a gravel base is the simplest and most affordable option for small footprints, typically running $4 to $7 per square foot for materials and DIY labor. Frost depth matters, consult local building codes to determine how deep footings must go to prevent heaving. Pier-and-beam foundations work well on sloped lots and provide access to plumbing, but they require more carpentry skill to level and square the structure. Regardless of foundation type, ensure proper drainage and vapor barriers to prevent moisture intrusion.
Framing lumber: Use kiln-dried dimensional lumber to minimize warping. Nominal 2×4s (actual dimensions 1.5″ × 3.5″) work for non-load-bearing walls: 2×6s provide better insulation depth and structural capacity for load-bearing elements. For roof rafters, 2×6 or 2×8 lumber on 16- or 24-inch centers is standard, depending on snow load and span. Engineered options like LVL (laminated veneer lumber) cost more but offer superior strength-to-weight ratios, useful for trailer builds.
Essential Building Materials and Tools You’ll Need
A realistic materials list prevents mid-project runs to the hardware store and budget blowouts.
Structural materials:
- Pressure-treated lumber for floor joists and any ground-contact framing
- Kiln-dried 2×4 and 2×6 studs
- 3/4-inch tongue-and-groove plywood or OSB for subfloor and roof sheathing
- 1/2-inch OSB or plywood for wall sheathing
- House wrap (Tyvek or equivalent) and flashing tape
- Roofing material: metal panels or architectural shingles
- Windows and exterior door (pre-hung units save time)
- Insulation: spray foam, rigid foam, or batt insulation (R-value depends on climate)
Fasteners and hardware:
- Galvanized structural screws and framing nails
- Hurricane ties and joist hangers
- Exterior-grade construction adhesive
Tools required:
- Circular saw (a miter saw improves accuracy for trim and angled cuts)
- Cordless drill and impact driver
- Framing square, speed square, and 25-foot tape measure
- 4-foot level (longer is better for wall plumb checks)
- Chalk line
- Utility knife
- Safety gear: safety glasses, work gloves, dust mask or respirator, and ear protection
Optional but helpful: A table saw for ripping sheet goods, a pneumatic framing nailer (speeds up framing significantly), and sawhorses.
Buy materials in stages to avoid storage headaches and price fluctuations. Lumber and plywood prices vary by region and season, lock in pricing when possible, but expect some variability.
Step-by-Step Construction Process: From Floor to Roof
Construction follows a logical sequence. Skipping steps or rushing leads to compounding errors.
1. Floor framing and decking:
Start with a level, square foundation or trailer. For trailer builds, attach floor joists (typically 2×6 or 2×8 on 16-inch centers) perpendicular to the trailer frame using joist hangers and lag bolts. Install rim joists around the perimeter. Fasten 3/4-inch tongue-and-groove plywood subfloor with construction adhesive and screws every 6 inches along joists. Check for squeaks before proceeding.
2. Wall framing:
Frame walls flat on the subfloor, then tilt them into place, this is easier and more accurate than stick-building vertical studs. Use a bottom plate, top plate, and studs on 16-inch centers. Frame window and door rough openings 1/2 inch larger than the unit dimensions to allow for shimming. Double up studs at corners and beside openings for structural support. Temporary diagonal bracing keeps walls plumb until sheathing is applied.
3. Sheathing and house wrap:
Cover exterior walls with 1/2-inch OSB or plywood, staggering seams and fastening every 6 inches along edges, 12 inches in the field. Apply house wrap starting from the bottom, overlapping seams by 6 inches and taping all joints. Proper sequencing prevents water intrusion.
4. Roof framing:
Rafter or truss style depends on design. Rafters allow for cathedral ceilings but require more carpentry skill, calculate the ridge height, rafter length, and birdsmouth cuts carefully. Trusses are pre-engineered and easier for beginners but limit loft headroom. Attach rafters or trusses on 16- or 24-inch centers with hurricane ties. Sheath the roof with OSB or plywood, then install underlayment (felt paper or synthetic) before roofing.
5. Roofing:
Metal roofing panels are popular for tiny homes, lightweight, durable, and DIY-friendly. Start at the eave and work upward, overlapping panels per manufacturer specs. Architectural shingles work too but add weight. Seal all roof penetrations (vents, chimneys) with flashing and roofing cement.
6. Windows and doors:
Install pre-hung units in rough openings, shimming to level and plumb. Fasten through the jamb into framing, then apply flashing tape around the perimeter before siding.
Installing Plumbing, Electrical, and HVAC Systems
Mechanical systems separate habitable tiny homes from garden sheds. Each system has code requirements and safety implications.
Electrical:
Most tiny homes run on standard 120/240V service, requiring a 100- or 200-amp panel depending on load. The National Electrical Code (NEC) applies even to small structures. Hire a licensed electrician or work under permit if the builder lacks experience, improper wiring causes fires. Use 12-gauge wire for 20-amp circuits (kitchen, bathroom) and 14-gauge for 15-amp lighting circuits. GFCI outlets are mandatory in wet locations (kitchen, bath). AFCI breakers are required in bedrooms per current code. Plan for adequate outlets, NEC requires receptacles every 12 feet along walls.
Plumbing:
PEX tubing has largely replaced copper for supply lines, it’s flexible, affordable, and easier to install. Run hot and cold lines from a water heater (tankless units save space) to fixtures. Drain lines require proper slope: 1/4 inch per foot for horizontal runs. Vent stacks prevent siphoning and sewer gas intrusion: code typically requires a 1.5- or 2-inch vent extending through the roof. Trailer-based tiny homes often use RV-style fresh and gray water tanks with 12V pumps: permanent builds connect to municipal or well systems. Winterization is critical in cold climates, insulate lines and install heat tape where necessary.
HVAC:
A well-insulated tiny home under 400 square feet can often be heated with a single mini-split heat pump (extremely efficient and handles cooling too) or a small vented propane heater. Avoid unvented propane or kerosene heaters, they produce moisture and carbon monoxide. Ventilation matters in tight spaces: install a bathroom exhaust fan and consider a heat recovery ventilator (HRV) for fresh air exchange without energy loss. Many experienced builders suggest researching energy-smart construction techniques for optimal climate control. Do not overlook humidity control: condensation damages walls and finishes.
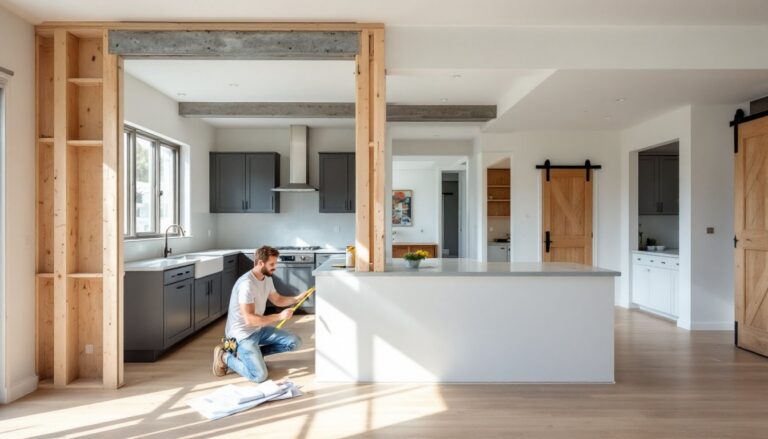
Interior Finishing: Maximizing Space and Functionality
Interior finishes transform a framed shell into a livable home. Every design choice should prioritize function and space efficiency.
Insulation and drywall:
Insulate walls and ceiling to at least R-13 in walls and R-30 in the ceiling (climate-dependent). Spray foam offers the best air-sealing and R-value per inch but costs more: fiberglass batts are budget-friendly if installed carefully with no gaps. Cover with 1/2-inch drywall, taping and mudding seams. Lightweight alternatives like plywood paneling or shiplap reduce weight in trailer builds and speed installation.
Flooring:
Vinyl plank flooring is waterproof, durable, and DIY-friendly, ideal for tiny homes. Engineered hardwood adds warmth but costs more and is less moisture-tolerant. Avoid ceramic tile in trailer builds: road vibration cracks grout. Underlayment (foam or cork) improves comfort and sound dampening.
Kitchen and bath:
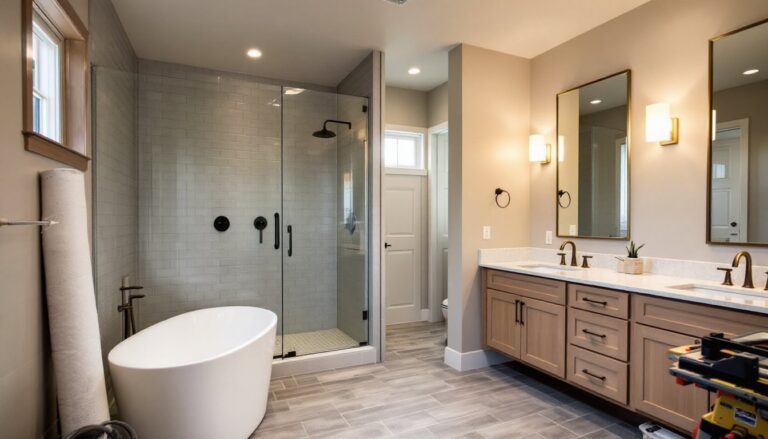
Compact appliances are essential. Apartment-sized refrigerators (10 to 12 cubic feet), two-burner cooktops, and combination washer-dryer units fit tiny footprints. Consider a composting toilet if plumbing is limited. Install a 32-inch shower pan instead of a tub to save space. Use wall-mounted sinks and fold-down tables.
Storage solutions:
Built-in cabinetry, under-stair drawers, and loft storage maximize usable space. Many seasoned DIYers reference multipurpose furniture ideas to optimize layouts. Vertical storage (shelves, pegboards, hooks) keeps floors clear. Avoid clutter, tiny homes demand ruthless organization.
Utilities and final touches:
Run finish electrical (switches, outlets, light fixtures) and plumbing fixtures (faucets, shower heads). Install trim, baseboards, and window casings. Paint or stain surfaces, lighter colors make small spaces feel larger. Add curtains or blinds for privacy.
Final inspection:
If the build required permits, schedule final inspections for electrical, plumbing, and occupancy. Addressing code violations after the fact is expensive and frustrating. For additional guidance on permits and inspections, builders often consult resources like expert contractor recommendations to navigate local requirements. Permanent tiny homes must pass the same inspections as conventional houses in most jurisdictions.