
Table of Contents
ToggleMobile home kitchens come with unique constraints, lower ceiling heights, thinner walls, and dimensions that don’t always match stick-built standards. Factory-installed cabinets are often builder-grade particleboard that sags, delaminates, or simply doesn’t fit the homeowner’s style. Whether someone’s replacing worn-out boxes or planning a full remodel, understanding the differences between mobile home and traditional cabinetry saves time, money, and a lot of frustration. This guide covers sizing standards, material choices, measurement strategies, installation realities, and budget-friendly refresh options that work within mobile home construction limits.
Key Takeaways
- Mobile home kitchen cabinets require shorter dimensions—upper cabinets typically measure 27 to 30 inches tall versus the standard 30 to 42 inches in site-built homes, making proper measurement essential before ordering replacements.
- Quality materials matter: plywood-based cabinets with solid-wood frames cost more upfront but resist moisture, hold fasteners better, and last decades compared to particleboard alternatives commonly found in factory-installed boxes.
- Successful installation depends on locating wall studs precisely and using appropriately sized fasteners (2½-inch cabinet screws into solid framing) because mobile home walls with thin lumber and paneling won’t support the same screw-hold as conventional framing.
- Budget-friendly refresh options like painting, replacing hardware, adding crown molding, or installing under-cabinet lighting can dramatically improve mobile home kitchen cabinets without the expense of full replacement.
- DIY installation is feasible for homeowners with basic skills and proper tools, but structural modifications, plumbing relocation, and electrical work require licensed contractors due to HUD Code regulations and insurance concerns.
- RTA and stock cabinets adapted from big-box stores or purpose-built RV cabinets offer practical alternatives to custom solutions, with costs ranging from $100 to $300 per unit depending on material quality and assembly requirements.
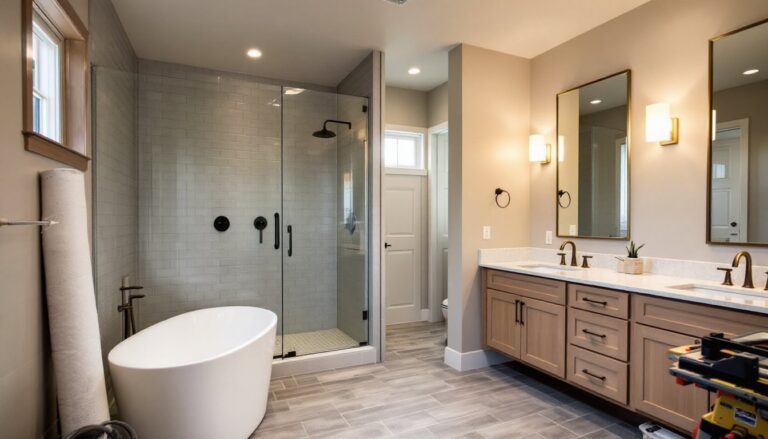
Understanding Mobile Home Kitchen Cabinet Standards and Sizes
Mobile homes use shorter wall cabinets than site-built homes. Standard residential upper cabinets run 30, 36, or 42 inches tall. Mobile home uppers typically measure 27 to 30 inches to accommodate 7- to 8-foot ceiling heights and lower soffits. Depth stays consistent at 12 inches, but width increments lean toward 24-, 27-, and 30-inch modules rather than the 12-, 15-, 18-inch steps common in traditional cabinetry.
Base cabinets in mobile homes usually sit at the standard 34½-inch height (36 inches with countertop), but shallower depths, 21 inches instead of 24, sometimes appear in older single-wides to preserve narrow aisle space. Anyone planning a retrofit should measure existing boxes before ordering replacements, because non-standard depths limit countertop and appliance options.
Wall studs in mobile homes run 16 or 24 inches on center, similar to conventional framing, but the wall itself is often 2×3 lumber with thin paneling or drywall over foam insulation. That construction won’t support the same screw-hold as 2×4 or 2×6 framing, so cabinet installers must locate studs precisely and use appropriately sized fasteners, typically 2½-inch cabinet screws into solid framing, never just into paneling.
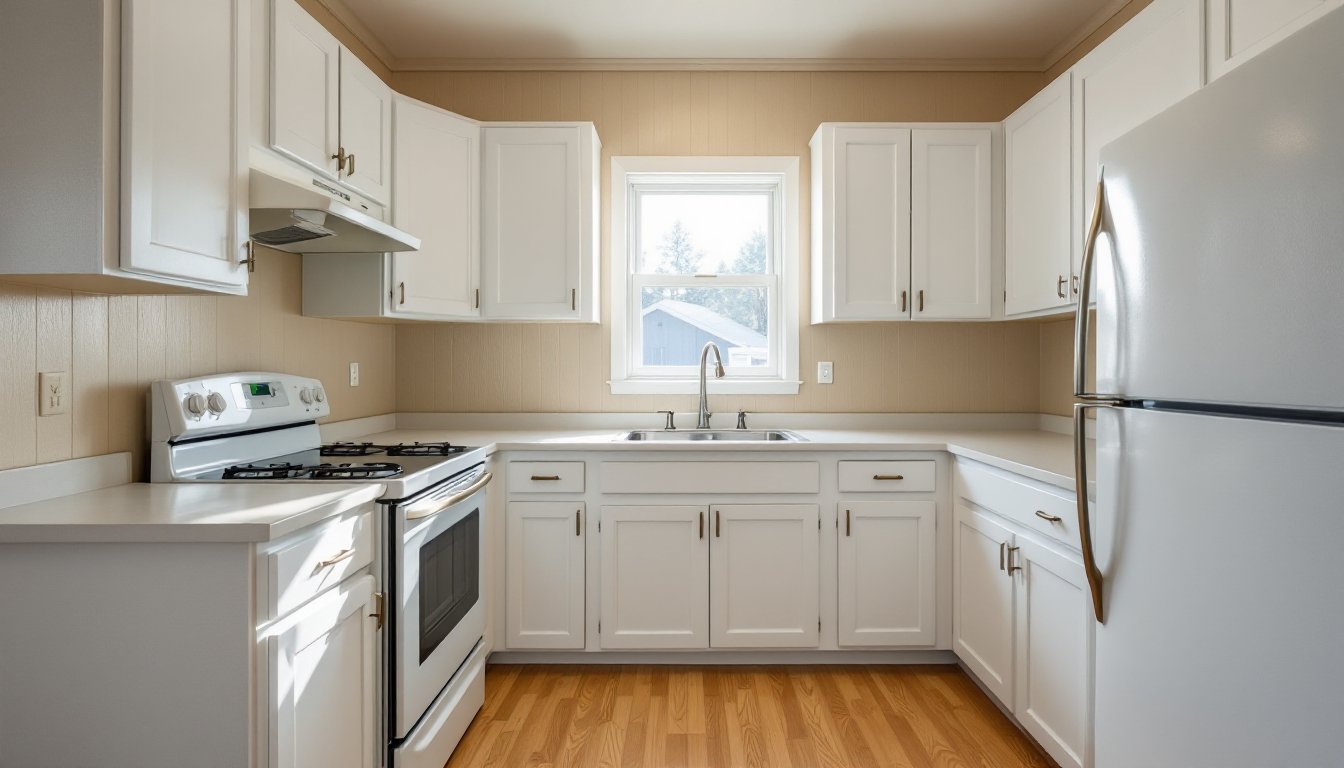
Factory cabinets in older mobile homes frequently use stapled particleboard boxes with a vinyl or melamine finish. These disintegrate under moisture and age poorly. Replacement cabinets designed for mobile homes are sold by RV and manufactured-home suppliers, but many DIYers successfully adapt stock cabinets from big-box stores by trimming height or using filler strips to close gaps.
Best Materials and Styles for Mobile Home Kitchen Cabinets
Budget-Friendly Cabinet Options
Ready-to-assemble (RTA) cabinets from retailers like IKEA, Home Depot, and Lowe’s offer the lowest per-unit cost, often $100 to $200 per cabinet, and ship flat-packed. Quality varies: look for plywood box construction rather than particleboard, and cam-lock hardware that allows repeat disassembly without stripping threads. RTA cabinets require assembly time but ship quickly and suit DIY installation.
Stock cabinets sold in standard sizes from big-box stores run slightly higher, $150 to $300 each, but arrive pre-assembled. Brands like Hampton Bay and Glacier Bay use particleboard cores with thermofoil or laminate doors, which resist moisture better than bare particleboard but can peel at edges if exposed to steam or heat. These cabinets work well in mobile homes if trimmed to fit shorter wall runs.
RV and marine cabinets are purpose-built for compact, mobile spaces. Manufacturers like RecPro and Tiffin sell units designed for 27-inch heights and shallow depths, often with cam-lift hinges that prevent doors from swinging open during transport. Prices range from $120 to $250 per cabinet, and they’re pre-finished in neutral tones. They won’t win design awards, but they fit mobile home dimensions without modification.
Premium Materials Worth the Investment
Plywood box cabinets with solid-wood face frames cost $300 to $600 per unit but last decades. Plywood resists moisture, holds screws better than particleboard, and won’t sag under countertop weight. Brands like KraftMaid and Merillat offer semi-custom lines that accommodate non-standard heights and widths, critical in mobile home kitchens where wall runs rarely align with modular increments.
Dovetail drawer boxes with full-extension soft-close slides add $50 to $100 per drawer but transform usability in narrow kitchens. Soft-close mechanisms also reduce vibration and noise, a bonus in mobile homes where wall cavities carry sound more readily than insulated stick-built walls. Many home improvement experts emphasize that investing in quality drawer hardware pays off in daily convenience, especially in high-traffic kitchens.
Hardwood doors in oak, maple, or cherry elevate aesthetics and allow future refinishing. Avoid overly ornate raised-panel designs in small mobile home kitchens: slab or shaker-style doors in lighter finishes make compact spaces feel larger. Painted finishes in white, gray, or light blue remain popular and hide minor dings better than stained wood.
How to Measure and Plan Your Mobile Home Kitchen Cabinet Layout
Start with a blank floor plan drawn to scale, ¼ inch equals 1 foot works well. Measure the room’s length and width at floor level, then again at countertop height (36 inches): mobile home floors and walls can shift over time, creating out-of-square corners and sloped floors.
Mark all obstacles: windows, doors, electrical outlets, plumbing supply lines, vent stacks, and the main electrical panel if it’s in the kitchen. Note the swing direction of doors, a refrigerator door that opens into a cabinet creates daily annoyance. Measure the distance from the floor to the ceiling at multiple points: variations of an inch or more are common and affect upper cabinet installation.
Locate wall studs with a stud finder, then verify by tapping or drilling small pilot holes. Mark stud centers on the wall with painter’s tape. In mobile homes, studs sometimes shift off-center or disappear entirely where windows or door frames interrupt framing. If a stud falls where a cabinet seam lands, great: if not, plan to use toggle bolts or backer boards to anchor cabinets between studs.
Plan for appliances first. Standard ranges are 30 inches wide: refrigerators vary from 30 to 36 inches and need 1 inch of clearance on each side for ventilation and door swing. Dishwashers require 24-inch openings plus access to plumbing and a 120V outlet. Built-in microwaves need dedicated 18- or 24-inch cabinets with rear knockouts for power cords.
Once appliances are positioned, fill in base cabinets, leaving at least 15 inches of counter space on either side of the cooktop and 18 inches beside the sink for prep work. Upper cabinets should align with base cabinets below, but avoid hanging uppers directly over the range unless they’re at least 30 inches above the cooktop to meet fire-safety clearances.
Compact kitchens often benefit from small-space solutions like corner lazy Susans, pull-out pantry units, and shallow upper cabinets that don’t crowd narrow aisles. Many mobile home remodelers use 18-inch-deep wall cabinets above the sink or range to gain storage without blocking sightlines.
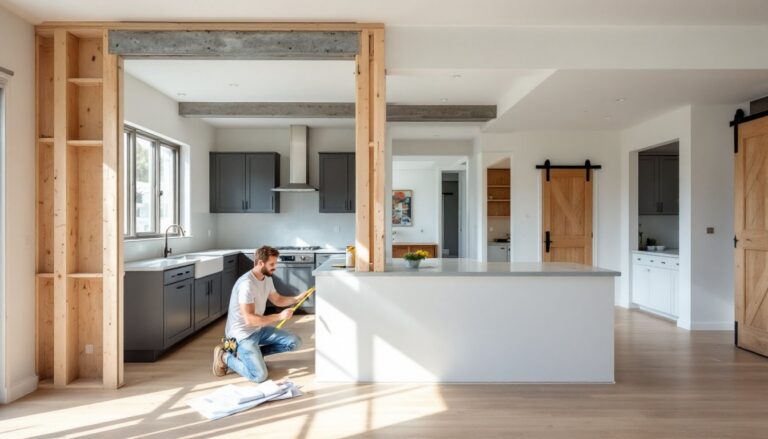
DIY Installation vs. Professional Help: What You Need to Know
DIY installation is realistic for anyone comfortable using a drill, level, and stud finder. RTA and stock cabinets come with instructions, and online videos from manufacturers and retailers walk through every step. Budget two to four days for a typical 10-foot run of base and wall cabinets, longer if demolition and drywall repair are involved.
Essential tools include a 4-foot level, cordless drill with Phillips and screw-drive bits, cabinet shims, clamps, a tape measure, and a circular saw or jigsaw for scribing filler strips. A laser level speeds layout but isn’t mandatory. Rent or borrow a right-angle drill if installing in tight corners where a standard drill won’t fit.
Safety requirements: Wear eye protection when cutting or drilling overhead, and use a dust mask if sanding or cutting particleboard. Turn off power at the breaker before working near outlets or light fixtures. Mobile home walls are thinner than conventional walls: it’s easy to drill through paneling and hit wiring or plumbing on the opposite side. Always drill shallow pilot holes first.
When to hire a pro: Structural modifications, removing walls, relocating plumbing, or rewiring circuits, often require permits and licensed contractors under the International Residential Code (IRC) and National Electrical Code (NEC). Mobile homes have specific HUD construction standards (HUD Code), and alterations to load-bearing components or utility chases may void insurance or resale warranties. If the floor is sagging or walls are noticeably out of plumb, consult a contractor experienced in mobile home repair before hanging cabinets.
Professional cabinet installers charge $50 to $150 per cabinet for labor, or $1,500 to $4,000 for a full kitchen. They bring specialized tools, know how to shim cabinets level on uneven floors, and guarantee the work. For someone replacing 15 cabinets in a double-wide with plumbing and electrical tie-ins, professional installation often pays for itself in time saved and mistakes avoided.
Top Ways to Refresh Existing Mobile Home Kitchen Cabinets
Paint or refinish doors and frames. Clean all surfaces with TSP (trisodium phosphate) to remove grease and grime, then sand lightly with 150-grit sandpaper to rough up the finish. Prime with a bonding primer like Zinsser B-I-N or KILZ Adhesion, then apply two coats of cabinet-grade paint (Benjamin Moore Advance or Sherwin-Williams ProClassic). Use a foam roller for smooth surfaces and a quality brush for edges. Budget one gallon of paint per 10 cabinet doors: coverage varies with porosity. Allow 24 hours of dry time between coats and a full week of cure time before reattaching hardware.
Replace hardware. Swapping dated brass or plastic knobs for modern bar pulls or cup pulls costs $2 to $10 per piece and takes an afternoon. If new hardware doesn’t match old screw holes, fill holes with wood filler or toothpicks and glue, then drill new pilot holes. Center pulls on drawer and door stiles for a clean look: standard placement is 2½ to 3 inches from the bottom of upper cabinet doors and centered on drawer fronts.
Add crown molding or trim. A 1×2 or 1×3 pine board nailed along the top edge of wall cabinets and finished with paint or stain gives a built-in look for under $50 in materials. Use a miter saw for clean 45-degree corners, or buy pre-cut corner blocks if mitering isn’t an option. Attach trim to cabinet tops with 18-gauge brad nails or construction adhesive, not to the ceiling, mobile home ceilings flex, and nailing into them can crack drywall tape.
Install under-cabinet lighting. Battery-powered LED puck lights or plug-in LED strip kits cost $20 to $60 and mount with adhesive backing or small screws. They brighten countertops and modernize the space without electrical work. For a cleaner look, hardwire low-voltage LED strips to a wall switch: this requires basic wiring skills and may need a permit if adding new circuits.
Refinish or replace countertops. If cabinets are structurally sound, a new laminate, butcher-block, or quartz countertop transforms the kitchen. Laminate starts around $10 per linear foot: quartz runs $50 to $100 installed. Some DIYers use compact custom solutions adapted from RV and tiny-home designs to maximize limited counter space. Install new countertops after painting cabinets to avoid paint drips on fresh surfaces.
Reface cabinet boxes. If frames are solid but doors are damaged, order new slab or shaker doors cut to size from online suppliers like CabinetNow or Barker Door. Prices range from $15 to $80 per door depending on material. Refacing costs less than replacement and takes a weekend, but only works if the existing boxes are square and sturdy, particleboard boxes with water damage should be replaced entirely.