
Table of Contents
ToggleMobile home kitchens pack a lot of function into a small footprint, but they often suffer from dated cabinets, low-grade finishes, and awkward layouts that haven’t changed since the 1980s. Remodeling one isn’t quite like renovating a site-built home, you’re working with thinner walls, non-standard dimensions, and construction methods that don’t always play nice with traditional renovation techniques. But that doesn’t mean you’re stuck with vinyl countertops and particleboard cabinets forever. With the right planning, material choices, and a clear-eyed understanding of structural limits, a mobile home kitchen remodel can deliver a dramatic transformation without very costly or the floor joists.
Key Takeaways
- A mobile home kitchen remodel requires special consideration due to non-standard dimensions, thinner 2×3 studs, and structural differences from site-built homes, making it essential to consult a contractor familiar with manufactured home construction.
- Budget-friendly cosmetic updates like cabinet refacing, modern laminate countertops, and peel-and-stick backsplashes can transform your kitchen for $2,000–$5,000 without major structural changes.
- Keeping the existing layout during your mobile home kitchen remodel saves thousands on plumbing and electrical work, as relocating sinks or appliances can become costly and complicated.
- Inspect the subfloor for sagging or soft spots before installing new flooring, as mobile home floors supported by steel I-beams require proper underlayment to prevent cracking.
- Maximize storage in a compact mobile home kitchen by installing open shelving, pull-out drawers, fold-down tables, and strategic task lighting to improve both functionality and perceived space.
- Full renovations with custom cabinets, granite or quartz counters, and new appliances can cost $15,000+ and take 6–8 weeks, so build in a 20% time buffer and 10–15% cost buffer for delays.
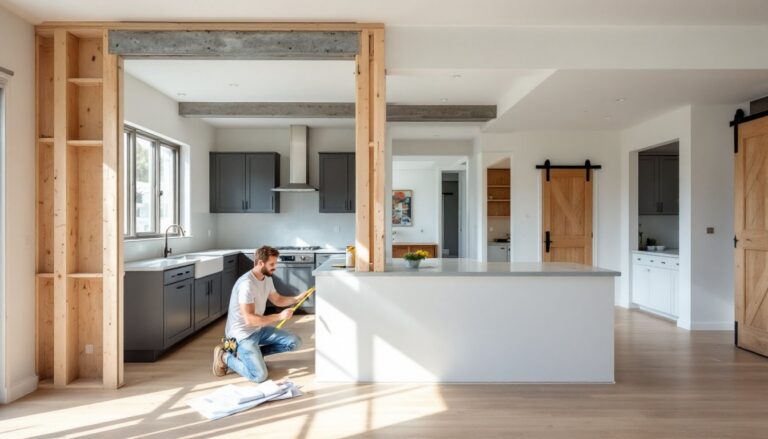
Why Mobile Home Kitchens Need a Unique Remodeling Approach
Manufactured homes are built to HUD Code, not the International Residential Code (IRC) that governs site-built homes. That means lighter framing, thinner walls (often 2×3 studs instead of 2x4s), and floors supported by steel I-beams rather than dimensional lumber joists. Cabinets are often stapled or glued directly to vinyl-covered wall panels, and plumbing and electrical runs may not follow the paths you’d expect.
Because of these differences, you can’t just rip out walls or move plumbing without understanding what’s holding things up. Load-bearing walls do exist in mobile homes, and removing one without proper support can cause sagging floors or roof damage. If you’re planning anything beyond cosmetic updates, moving a sink, relocating appliances, or opening up a wall, consult a contractor familiar with manufactured home construction.
Another key difference: standard cabinet and appliance dimensions don’t always fit. Older mobile homes may have narrower base cabinets (21 inches deep instead of the standard 24 inches) or unusual ceiling heights. Measure everything twice before ordering materials, and be prepared to adapt or custom-cut when standard sizes don’t cooperate.
Planning Your Mobile Home Kitchen Renovation
Start by defining what you want to change and why. Are the cabinets structurally sound but ugly? Is the layout functional, or does the fridge block the only walkway? Do you need more counter space, better lighting, or just a fresh finish? Answering these questions will help you focus your budget where it matters.
Take detailed measurements of the entire kitchen: cabinet widths and depths, countertop square footage, distances between appliances, and any oddball dimensions like angled walls or soffits. Mobile homes often have quirks, bulkheads that hide ductwork, wall panels that aren’t plumb, or floors that aren’t perfectly level. Document these now so you’re not surprised mid-project.
If you’re keeping the existing layout, you’ll save thousands on plumbing and electrical work. Moving a sink means rerouting drain lines and vents, which can get complicated fast in a mobile home where belly board access is limited. Relocating a range requires either running new gas lines (which must be done by a licensed plumber) or upgrading electrical service for a new electric range, both costly.
Setting a Realistic Budget and Timeline
Mobile home kitchen remodels can range from $2,000 for a cosmetic refresh to $15,000+ for a gut renovation with new cabinets, countertops, flooring, and appliances. Material costs for kitchen remodeling projects vary widely by region and finish level, so check recent pricing in your area before locking in a budget.
A cosmetic update, paint, cabinet hardware, countertops, and backsplash, can be done in a long weekend for $2,000–$5,000 in materials. A mid-range remodel with new stock cabinets, laminate or butcher block counters, and vinyl plank flooring typically runs $6,000–$10,000 and takes two to four weeks. A full renovation with custom or semi-custom cabinets, quartz or granite counters, new appliances, and upgraded plumbing/electrical can hit $15,000+ and take six to eight weeks, especially if you’re waiting on custom orders.
Timeline killers: back-ordered cabinets (currently 8–12 weeks for many semi-custom lines in 2026), delayed appliance deliveries, and unforeseen structural issues like rotted subfloor or outdated wiring. Build a 20% time buffer into your schedule and a 10–15% cost buffer into your budget for surprises.
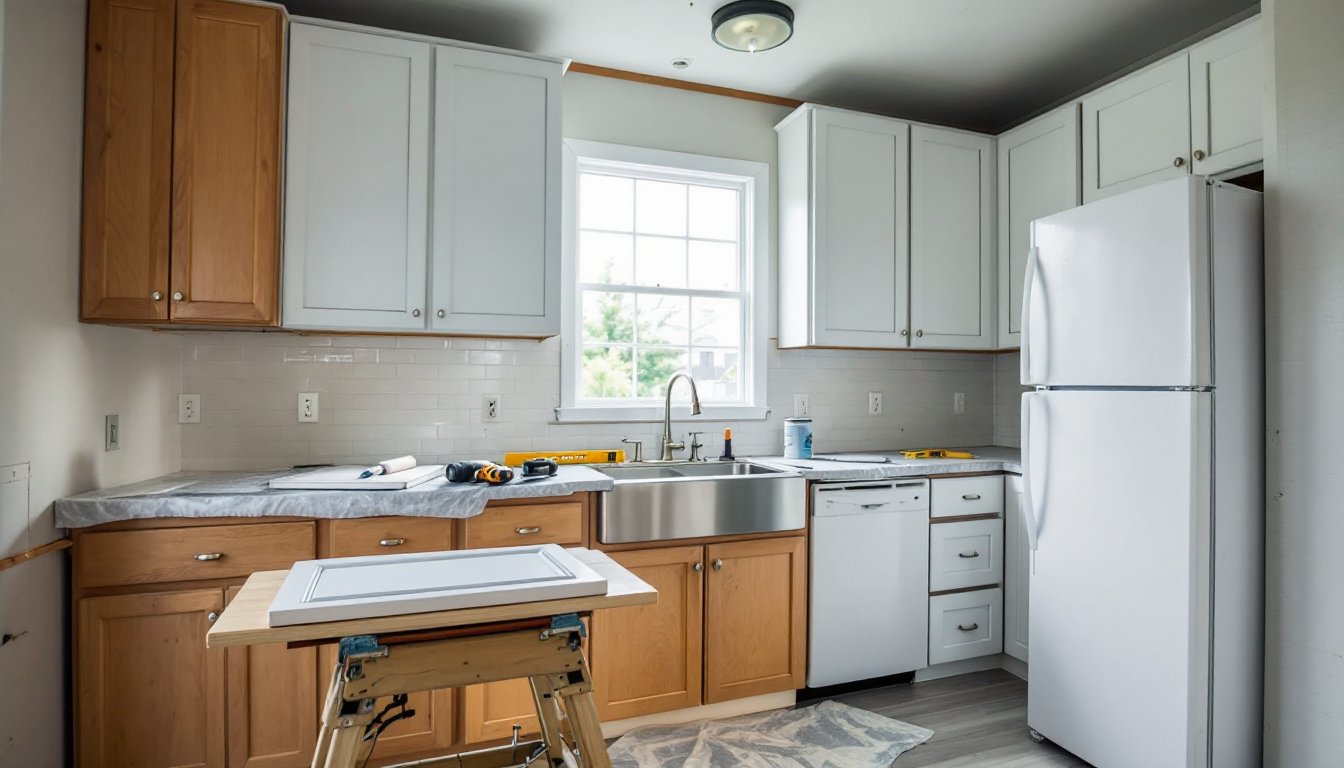
Budget-Friendly Updates That Make the Biggest Impact
If a full remodel isn’t in the cards, focus on high-visibility changes that refresh the space without tearing everything out.
Paint or reface cabinets. If the cabinet boxes are solid, you don’t need to replace them. Clean and sand the doors, apply a bonding primer (like INSL-X Stix or Zinsser B-I-N), and finish with a durable acrylic enamel. Two coats of paint and new hardware can make 1990s oak cabinets look modern for under $300. For a more polished look, replace doors and drawer fronts with ready-to-assemble (RTA) options from companies that offer non-standard sizes, many mobile home cabinet boxes are slightly narrower or shallower than standard.
Upgrade countertops without going broke. Laminate has come a long way, modern patterns mimic stone convincingly and cost $20–$40 per linear foot installed. Butcher block is another affordable option at $30–$50 per linear foot, though it requires sealing and regular maintenance. If you want the look of stone, consider quartz remnants from a local fabricator: small kitchens often fit within a single remnant slab, cutting costs significantly.
Install a peel-and-stick or traditional tile backsplash. Peel-and-stick tiles are DIY-friendly and start around $10–$15 per square foot. For a more permanent solution, ceramic subway tile runs $3–$8 per square foot in materials and can be installed over cleaned, primed wall panels with the right adhesive (use a flexible thinset like Mapei Ultraflex or similar). A 20-square-foot backsplash takes a weekend and instantly modernizes the space.
Replace outdated lighting. Swap the old fluorescent box for LED recessed lights or a modern flush-mount fixture. Add under-cabinet LED strips ($25–$50 per run) to brighten work surfaces. Proper task lighting improves functionality and makes finishes look better.
New flooring anchors the room. Luxury vinyl plank (LVP) is ideal for mobile homes, it’s affordable ($2–$5 per square foot), durable, water-resistant, and installs as a floating floor that won’t stress the subfloor. Many DIYers can complete a 100-square-foot kitchen in a day. Make sure the existing floor is clean, level, and structurally sound before installation.
Structural Considerations and Common Challenges
Mobile home floors are built differently than site-built homes. The subfloor is typically 5/8-inch plywood or OSB over steel I-beams spaced 4 feet apart, with minimal support between beams. Over time, floors can sag or develop soft spots, especially near plumbing penetrations or exterior walls where moisture infiltration is common.
Before installing new flooring or heavy materials, inspect the subfloor. Walk the entire kitchen and note any flex, sag, or soft areas. If the floor feels spongy, you may need to add support, either sistering additional beams below (requires belly board access) or adding a layer of 1/2-inch plywood underlayment screwed into the existing subfloor. Don’t skip this step: tile and even rigid LVP can crack over a weak floor.
Wall studs in mobile homes are often 2x3s on 16- or 24-inch centers, covered with thin paneling or drywall. This limits your options for mounting heavy cabinets or open shelving. When hanging upper cabinets, locate studs with a stud finder and use appropriate fasteners, typically 3-inch cabinet screws driven into the stud. Toggle bolts or heavy-duty anchors work for lighter loads, but don’t trust them for a cabinet full of dishes. For heavy installations like a microwave or range hood, consider adding a horizontal mounting rail (a 1×4 or 1×6 ledger) screwed into multiple studs to distribute weight.
Plumbing and electrical work can get tricky. Mobile home plumbing often uses flexible PEX or polybutylene supply lines and ABS drain lines. If you’re replacing a sink or faucet, you’ll likely need to adapt connections, bring the old parts to the hardware store to match threads and sizes. Electrical outlets may be surface-mounted on wall panels rather than recessed in boxes. Adding new outlets or moving existing ones is a job for a licensed electrician familiar with mobile home wiring, which may not be grounded in older homes.
Finally, check your local jurisdiction for permit requirements. Cosmetic work typically doesn’t require permits, but moving plumbing, adding circuits, or altering walls often does. Many home improvement cost estimators include permit fees in their projections, so factor that in early.
Maximizing Storage and Functionality in a Compact Layout
Mobile home kitchens rarely have the luxury of a walk-in pantry or an island with seating. Every inch counts, so focus on vertical storage, multi-use fixtures, and smart organization.
Add open shelving or a pot rack. Removing one or two upper cabinet doors and installing open shelves creates display space for dishes or cookbooks while making the room feel larger. A ceiling-mounted pot rack frees up cabinet space and keeps frequently used pots within reach. Just make sure your ceiling joists (or the blocking between them) can support the weight.
Use drawer organizers and pull-out shelves. Deep base cabinets are notorious black holes. Retrofit them with pull-out shelves, lazy Susans, or custom drawer inserts to keep small items accessible. Many kitchen organization solutions are DIY-friendly and don’t require cabinet replacement.
Install a fold-down table or rolling cart. If counter space is tight, a wall-mounted fold-down table provides extra prep area when needed and tucks away when not in use. A rolling cart with butcher block or stainless steel top adds flexible workspace and storage without a permanent footprint.
Downsize or relocate appliances strategically. Standard refrigerators are 36 inches wide: consider a 30- or 33-inch model to free up a few precious inches. If your range is wedged into a corner where the oven door barely opens, moving it 12 inches can transform usability, but remember, moving gas or electric service isn’t trivial. Weigh the cost against the benefit.
Lighting matters as much as layout. Add task lighting under cabinets, inside pantry spaces, and over the sink. Bright, well-lit kitchens feel larger and function better. For design inspiration on maximizing small spaces, explore curated remodel guides that focus on efficient layouts.
Conclusion
A mobile home kitchen remodel requires a different playbook than a traditional renovation, but the payoff, better function, modern finishes, and a space you actually enjoy cooking in, is absolutely achievable. Focus on understanding the structure you’re working with, set a realistic budget with room for surprises, and prioritize updates that deliver the most visual and functional impact per dollar spent. Whether you’re painting cabinets or installing new countertops, take your time with prep work, measure twice, and don’t hesitate to call in a pro when the job crosses into structural or code territory.